After the game, I set my army back up in a reasonable configuration so it could be paint judged. I also glued back on 5 of my magnets that came off. Ive magnetized my army with a sheet of metal from home depot and rare earth magnets, but the glue is much less strong than the magnets and they keep coming off. Im using ZAP a GAP, which is supposed to be pretty good! Some one recommended I use green stuff to give the magnet more to hold onto, which I started doing at the tourney when repairing broken figures, and that seemed to work pretty well.
Id ordered some of the very snazzy looking Litko magnets that my friend Matt uses with his skaven, but they hadnt arrived yet.
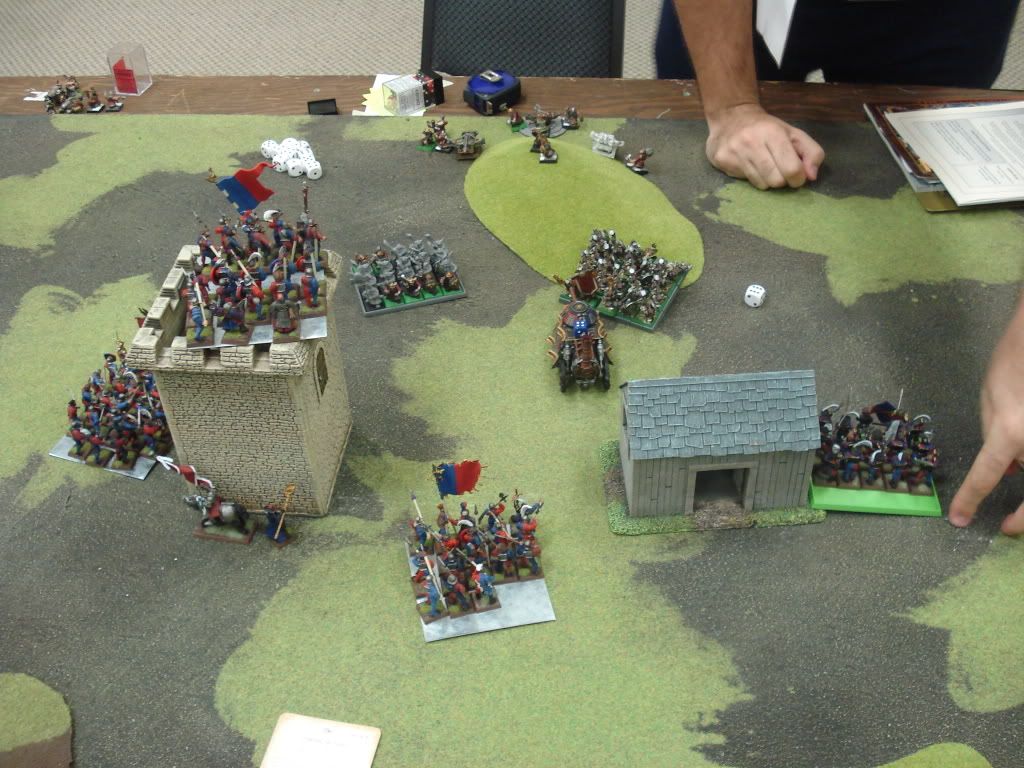
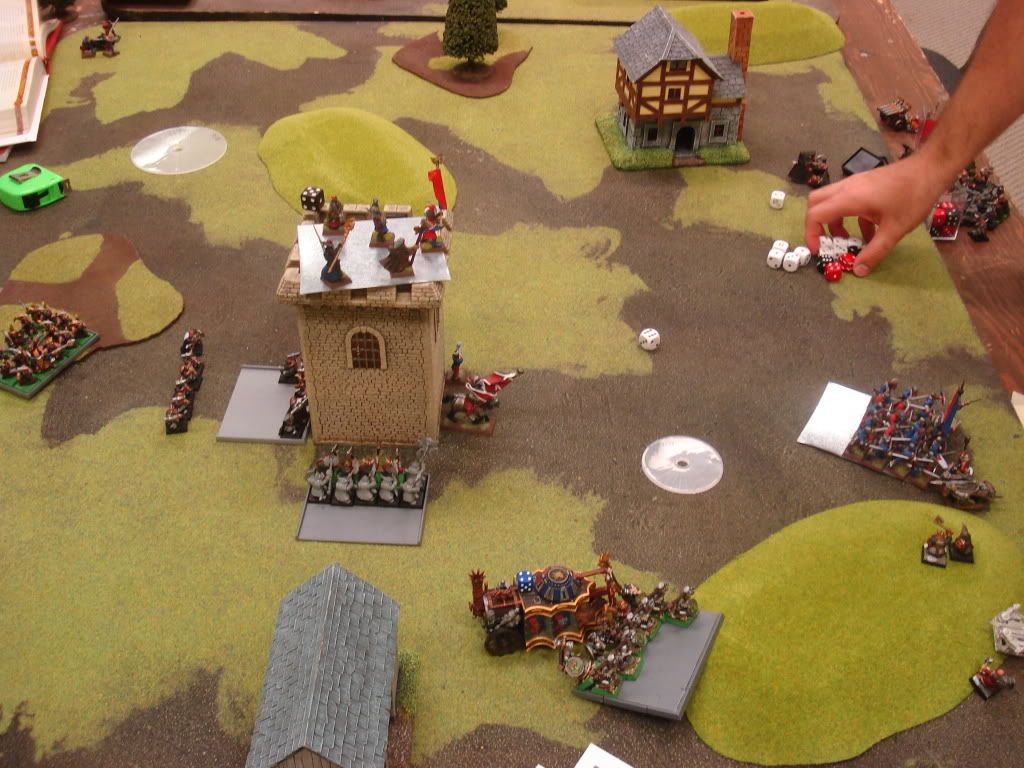
GAME 2: Victory Condition Control the WatchTower!
This game was against Mark Aksels dwarves. My opponent would have also won his first game. I wasnt that impressed with the list upon first glance, but he went on to soundly defeat me and be one of the top 2 armies, so obviously he was doing something right.
He had:
Runelord, Anvil of Doom, Runic Talisman
Josef Bugman
Thane BSB with Master Rune of Gomril
13 Quareller Rangers
20 Dwarf Warriors with GW
20 Longbeard Rangers
19 Hammerers with MRoGrugni
16 Miners with steamdrill
2x Cannons (Forging, Burning)
2x GrudgeThrower ( Accuracy, Accuracy & Burning)
1x Organ gun
His setup didnt take long at all, with 2 scout blocks and a block of miners. He deployed pretty centrally and I deployed to match with the bulk of my guys. I put one mortar unprotected in each corner, hoping to entice his ranger blocks to making these easy kills. I had trouble placing my cannons since there was a building and a hill and the watchtower blocking my LOS to all kinds of the battlefield. I eventually settled on a battery of mortar, cannon, cannon to the left of the tower, and one more cannon to the right. My greatswords went out on the right flank, planning to march around the building and flank the hammerers. Steamtank went right in front of the hammerers (who were joined by the BSB, I think). I put my crossbowmen out on the left in a rather vulnerable looking position, hoping some of his scout blocks might find them a tasty snack and stay away from the watchtower!
I was really worried about hammerers or someone getting into the watchtower and never ever fleeing until I had killed every last one. Halberdiers just dont have that much killing power against dwarf units. I messed up by putting the greatswords so far away from the building. In a building, only 10 models can fight, and anything for ranks and banners doesnt count its all about the kills. The greatswords would have been able to kill more than the halberds, I think.
I also wound up with sub par cannon placement: there were a couple times I was a hair off being able to see some of his war machines.
He put down his quarreler scouts in front of my left most motar, and his bugman scouts in front of my right most mortar. I was glad to see this placement since I really didnt care if he ate my mortars and that meant these units would be out of position for fighting around the tower.
He won the roll to go first (reasonable, since he was adding +1) and chose to go first. Let the artillery duel commence!
Dwarf Turn 1:
No charges, obviously. He moves his warriors and hammerers forward towards the tower. He moves his quarrelers forward so they are inside the 12 minimum range of the mortar. His bugman longbeards also move forward inside the minimum range of the right most mortar, while wheeling inwards slightly to be able to charge down the flank of my line. Thats fine, I dont intend to still be there in his next turn!
Magic: I save two dispel dice!
Shooting. Ah, the phase of pain. Both his cannons shoot my steam tank. I thought I had it out of line of sight from one of them, but was wrong. He failed to wound with both, however, which made me happy. So instead, he wrath and ruins my steamtank, correctly guessing it is aimed at his hammerers.
His grudge throwers take a big bite out of one of my halberd blocks, killing something like 17 guys. Sadly this is the block with the L2, not the L4, so I dont get a ward save from my ironcurse icon. His organ gun was out of range so didnt fire.
All in all, not too bad. Im kind of horrified at the wreckagae to my blocks even a small template can cause, but survivable.
Empire Turn 1:
No charges. ST generates 4 steam points.
My line surges forward, except for the xbows, who stand still. I really really want to get inside the building before he does! My steamtank moves a mighty 6 towards his hammerers. In case he gets wrath and ruined again, my war altar heads towards them as well. If I can tie up the BSB with a challenge for a while, I should be able to hold them up until my own guys get inside the tower.
Magic:
With a runelord and the I steal one of your dice power, I dont think I got anything off except throne of vines.
Shooting:
Aha, MY turn to unleash fiery war machine death!
My mortars shoot at the hammerers and manage to cause a grand total of one death, thanks to high dwarven T, lots of armor, and the master rune of grugni. I save my engineer reroll for the cannons.
My cannons do quite a bit better, blowing one of his cannons up and dealing a heroic one wound to a grudge thrower.
My crossbowmen FLIP OUT after my castigating them for being useless last game, and launch a salvo of long range shots at the organ gun. Half of them hit and I roll something like 4 6s for wounds. Bye by organ gun!
Dwarf Turn 2:
He charges bugmans longbeards into my cannon out on the right. His miners show up, and he anvils them into my grand battery. Thats disappointing, my battery is now doomed, but at least it means the steamtank wont be wrath and ruined! Instead of racing for the building like I expect, his warriors and hammerers set up to guard the gap between the farm house and tower that most of my army is trying to funnel through. His quarrelers ignore my tasty little bait mortar just BEGGING to be charged and instead wheel to be able to charge my xbows in the flank next turn.
Magic: He dispels throne of vines with his power dice. Lesson learned! Dont waste ones time with RiP spells when playing dwarves On the other hand, I get cocky and decide to save THREE dispel dice!
Shooting: Ouchie phase again! Not as bas as last time though, as hes down two war machines. I had managed to screen my tank behind a building, so his remaining cannon couldnt see it so shoots at
my war altar. Hits it, wounds, rolls a 6, I fail my ward, blows it up. Oops. AL ward saves the cannon ball and lives. (Cannons hit both the rider and the monster now, as template weapons). I had the 2+ ward save vs flaming item on my AL but I am not sure if it applies to the war altar or not. He grudge throwers my other halberdier block, but I make tons of 6+ armor saves and 6+ ward saves from the ironcurse icon so am not too badly mauled. Only lose about 10 guys.
Close combat:
His rangers destroy my right most cannon and reform to face my greatswords in the flank. His miners destroy one of the cannons in my battery and overrun into the mortar. (I had it cannon- mortar-cannon so that no matter which side they came on, they couldnt get to both cannons in one turn).
Empire Turn 2:
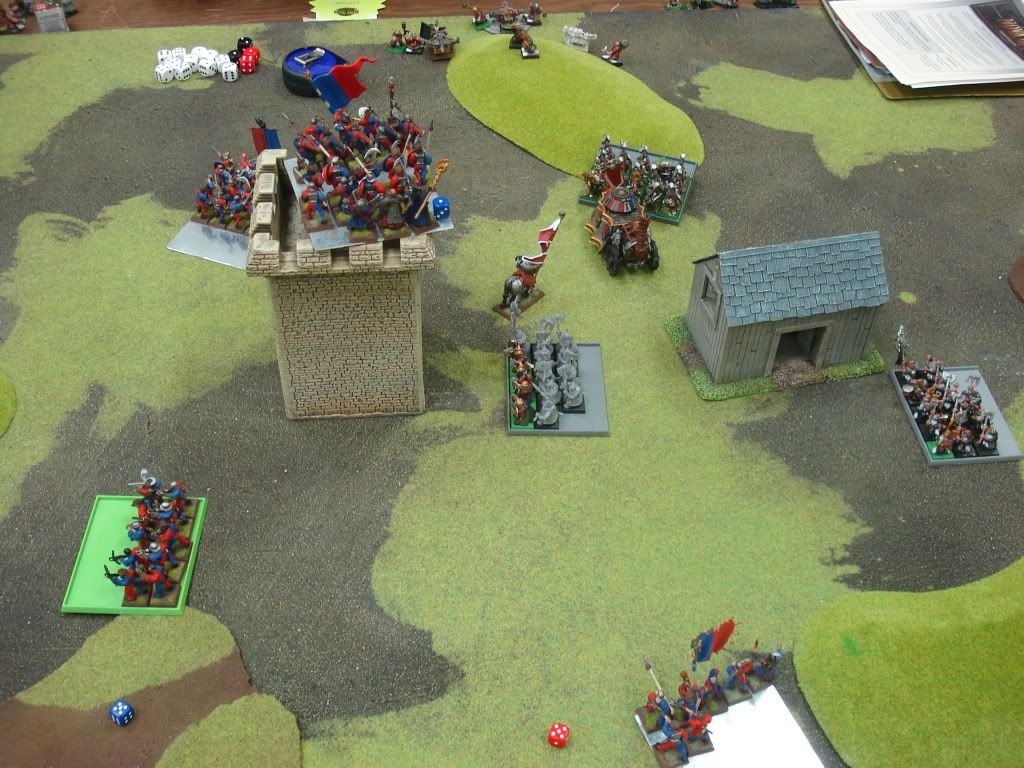
The wholly unmolested teamtank gleefully declares 4 steam points! Sadly he is 1 short of being able to charge my enemies blocks (no doubt just as my opponent fiendishly desired) so he just trundles forward. My greatswords move up even with the farmhouse, leaving the bugmans rangers eating dust at least a foot away. My halb block with the L4 wizard moves into the watch tower! Aha! Victory is mine! The halb block with the L2 moves up only a tiny bit, while the swordsmen move full speed up beside the watch tower. My hope is that he will charge the halbs and fail, allowing me to charge him in turn, and then flank with the swords, or turn to face the swordsmen coming up in his flank and allow my halbs to charge him. My now on foot arch lector decides to join the party in the watch tower.
The crossbowmen, looking nervously over their shoulder and sensing that the dwarven quarrelers want revenge for the massacre of the organ gun, decide discretion is the better part of valor and they can best save their hides by marching a full 8 TOWARDS the enemy board edge (and away from the quarrelers!).
My BSB and L2 cower in the shadow of the watch tower, hoping this will save them from dwarf grudge throwers.
Magic:
Nope, nothing.
Shooting:
Ah, the fun phase against dwarves. Peeved at the loss of the war altar, my remaining cannon uses the engineers expertise to smash his remaining cannon to itty bitty splinters. The mortars try their luck at war machine hunting and despite getting a direct hit, fail to wound.
Close combat: he destroys the mortar and overruns into my remaining cannon.
Dwarf Turn 3:
He rolls something like an 11, 11 and 12 for charge distance and just barely manages to charge my greatswords in the rear with bugmans rangers and charges my halb block in the front with his greatweapon warriors and charge my crossbowmen in the flank with his quarrelers!. Ulp. Thats not according to plan at all! He may have used the anvil to move one of them actually into the charge distance. I think the longbeards. They were sooo far away I was shocked when they made it in!
His hammerers charge my steamtank, deciding to deny it the impact hits. Suddenly Im engaged all along the line!
Magic: Still nothing.
Shooting: His grudge throwers shoot at the tower and the guys inside, taking out a few more. Its MUCH less deadly inside though, since he only hits D6 of them. one of them scatters onto the swordsmen, killing a rank or two.
Close combat.
His hammerers dont even ding the steamtank.
His quarrelers kill 4 crossbowmen, they might kill one in exchange. they break and get away, fleeing towards the tower.
Bugmans rangers kill about half my greatswords, I kill 2-3 in exchange. I lose but am stubborn, and hold. I reform to face him.
His GW dwarves lose 3 or so to my halbs, then kill about 6 with their great weapons. I lose but hold.
Remaining cannon dies, his miners reform to face the tower.
Empire Turn 3:
Things didnt go so well for me last turn. I suddenly feel like my line and grand plan are in tatters thanks to all those successful long range charges. My steamtank generates I think 3 steam points.
My xbows rally and reform to face his quarrelers. This time they can stand and shoot if charged! My L2 is feeling vulnerable to quarreler fire and decides that since all the cool people are inside the tower, hell go in there too!
My swordsmen, their cunning plan of flank charging now ruined by the small fact that a giant watch tower made of stone is between them and their intended target, decides to trudge over to the grudge thowers and anvil of doom. The BSB moves behind his warriors in order to also be able to charge his war machines but close enough to his guys to hopefully be protected from template weapons by the on going close combat.
Magic:
Nope, still nothing. I know, Im surprised too.
Shooting:
My mortars continue to fail to harm dwarves and my cannons are all dead.
Close combat.
Yikes, even more disasters. The greatswords kill several of bugmans rangers (8 dead so far) but are then wiped out to a man.
My halberdiers kill several more GW dwarf warriors (6 dead so far) but then lose about 7 guys and break and run only 7 of them are left, I am no longer steadfast. The warriors reform to face the tower.
My steamtank grinds and steamguns, and manages to knock out 4 more hammerers. He wounds it a couple times though.
Dwarf Turn 4:
His warriors declare a charge on the tower. He anvils the bugmans rangers closer. The miners move towards the tower. The quarrelers move towards the tower.
Shooting: He manages to scatter a grudge thrower shot right on top of my xbowmen. It promptly kills all but one. He doesnt panic though!
Close combat: My AL and 10 halbs fight his 10 warriors. With the help of hatred, I kill 4, he kills more, but Im steadfast so he has to retreat away from the tower.
Empire Turn 4:
My swordsmen are 16 away from the warmachines, so decline to charge, instead moving closer. The BSB realizes his rerolls are going to be needed to hold the tower so instead moves right next to it instead of charging off towards war machines.
The lone crossbowmen moves around to the dwarf side of the tower ironically thats the safest side, with dwarf quarrelers approaching from the left, miners approaching from my swide, and rangers and warriors approaching from the right.
Magic:
Something actually gets through! I think I manage to regrow like 3 halberdiers or something.
There is a possibility that the game ends this turn if we roll a 6, but we dont, so on to turn 5!
Dwarf Turn 5:
He charges bugmans rangers into the tower to fight. Anvils the quarrelers closer. The miners move closer too.
Shooting: He tries to hit my BSB with a grudge thrower. I argue that he cant since the template, if placed directly on the BSB, would overlap the building in which a close combat is happening, but he says he doesnt have to place it directly over the BSB but the hole can go at one corner of the base. Since I have the base perpendicular to the tower, rather than parallel, it doesnt hit the tower. Im not sure this is the way it goes, but then I remember my BSB should have been an inch away from the tower anyway so we let him make the shot. It scatters away and doesnt cause damage.
Close combat: My AL challenges, his champ accepts. Champ dies. (I was hoping Bugman would accept!). My halbs, helped by hatred, flip out and kill FIVE long beard rangers.
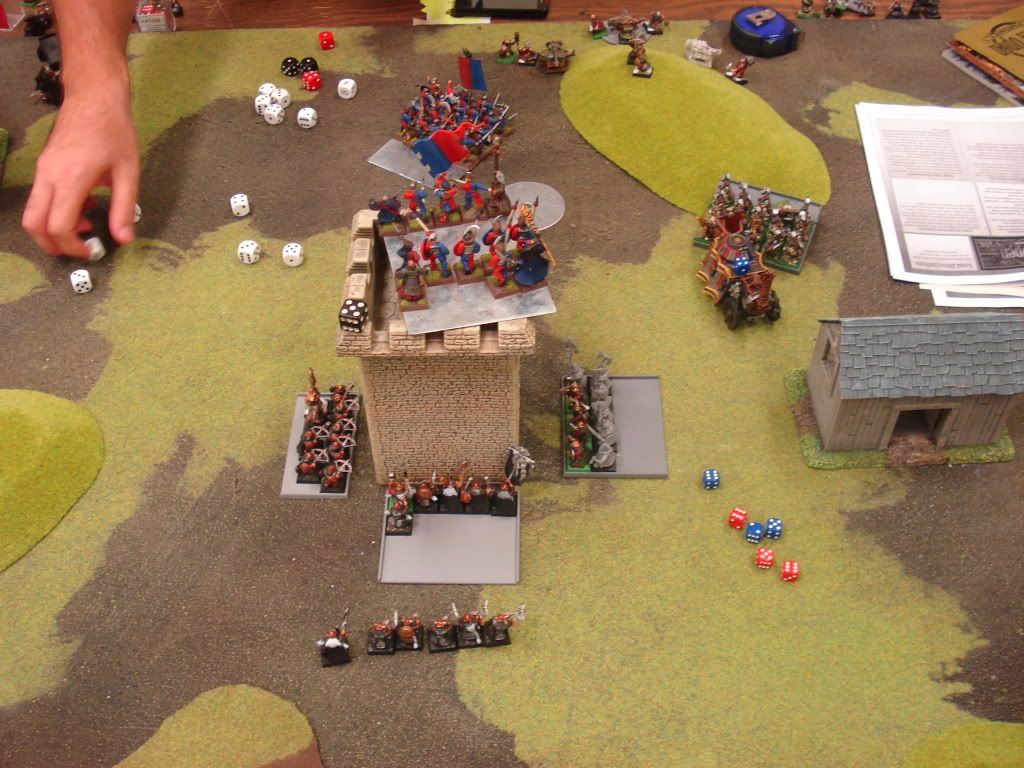
There are only 5 guys and bugman left in that unit, but THEY flip out and kill SEVEN halberdiers! I have 2 men left in the halb unit, the AL, and two wizards, holed up in the tower. I pass my LD test but its not looking pretty.
Hammerers are still fighting ST but neither of us really cares about that fight anymore. Its obvious neither side is going to win before the game ends.
Empire Turn 5:
I charge my swordsmen into a grudge thrower, and thats about it, for movement.
Magic:
Everything is dispelled. No regrowth on my halberds for me!
Close combat:
Swordsmen kill a grand total of one crewman. Crewman is stubborn so holds up the entire swords block, protecting the anvil from harm.
At this point we need to roll a 5 or 6 to end the game, which we proceed to do.
We have some difficulty deciphering the win conditions here. I am in the tower, which would give me the win. But there is a clause saying If there is a close combat going on in the tower, count both sides as in the tower. Technically the close combat ends because either the attacker wins and the defender flees, or the defender wins and the attacker is pushed back an inch, so in theory this clause is pretty meaningless. I think the intent is pretty clearly that if there is an ongoing struggle for the watch tower that goal is a draw and you move on to the next goal, which is # of VP killed. Im getting really hungry so suggest we just count the watchtower as a tie and total up VP rather than spend half an hour reading building rules from the BRB.
I also felt it would be rather cheap to cheat him of his victory he definitely crushed my army, and if my last two guys in the tower managed to win the game surrounded by 4 larger fresher enemy units it would be strange. Still, its a point worth clarifying with the TOs for future tournies.
I had killed
Organ gun
cannon
cannon
Hed wiped out
3x cannons
mortar
Halberdier block
He won by about 300 VP, giving him the win on victory condition #2. So now I was at one crushing win and one crushing loss.
I felt pretty confident going into this game (feeling overly cocky from my previous victory perhaps) especially after the first turn where his shooting phase did minimal damage and killed 2.5 war machines in mine.
Then things went south in a hurry when he sniped the war altar and made those 3 very long range charges. My troops were just obliterated in close combat against all those GW using dwarves, hitting on 3s, wounding (and killing) on 2s. I think I was too focused on the watch tower and didnt pay attention to the rest of the battlefield as much as I should have. My opponent correctly surmised that it would be easier to take the tower if my whole army was dead first, and went about methodically destroying my guys. I put the greatswords way too far out on the flank to be of any use, and then sent my big swordsman block off to fight war machines. Plus I didnt place my cannons correctly for good lines of fire at his grudge throwers (which were the machines I really needed to kill). Fun game, learned a lot of important lessons.


